Ciao,
I have been wanting to do a nail post for ages and just haven't got around to it. I love painting my nails and have more nail polishes than any one person could need. I also invested in some nail dotting pens to take my nail painting skills to a whole new level. Up until today I had mastered polka dots, simple but very cute.
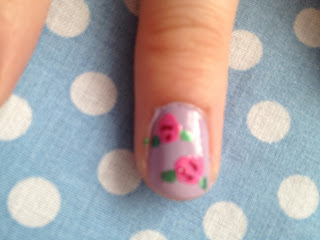
Then today I decided to try a pattern a work friend of mine had on her nails a few weeks ago...she wouldn't tell me how to do it but I googled it. Oh how I love the internet. Et voila!
Cute huh? Especially the pastel colours...perfect for spring! So here is how you get these cute nails!
1. Choose your colours: You will need a base colour, a light colour for the main flower shape, a darker shade of the same colour to draw petal lines and a green for leaves. Also nail dotting pens or a thin brush or even a cocktail stick.
2. Apply your base colour, I did 2 coats of this lilac and obviously waited for it to dry.
3. Next take the lighter of your two flower colours and dot random sized circles all over the nail, you can do as many as you want.
4. Whilst the flower is drying I use my dotting tool to paint on the leaves, I do two on either side but again you can adapt this however you want. I find the easiest way to get paint on the dotting tool is to put a pool of nail polish on the applicator lid of another nail polish so you can literally dip the tool in whenever you need more and you don't have to keep fiddling with lids.
5. When the flower shape is dried, take your dotting tool and using the darker colour paint small lines within the flower so as to create the look of petals.
6. Once all the nail polish is touch dry apply a clear topcoat to prevent the nail polish chipping.
There you have it, cute flowery nails. Enjoy :)
After I wrote this blog post my sister came home from school and she wanted hers done too. So here's some more pictures, hers are the blue and mine the purple.
Ciao for now...


